- Your cart is empty
- Continue Shopping


How To CORNICE A ROOM Featuring BUCKET GLOVE
-
ajay
- Posted on
- 0 comments
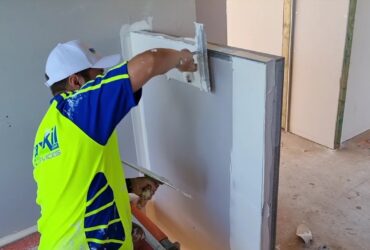
This is how to cornice a room and I show how easy it is to mix compound with a bucket glove Cornice is adhered to cover the junction between the ceiling and the walls and to add a decorative element to your room. If the room is already decorated remove any existing cornice and prepare the adhesion zone by removing any wallpaper and sanding painted surfaces or coating them with a PVA adhesive such as Bondcrete. For more detailed information, refer to the Gyprock DIY videos and Gyprock Residential Installation Guide, available at gyprock.com.au Make sure you use appropriate safety equipment including gloves, a dust mask, safety glasses and hearing protection. SHOPPING LIST • Gyprock Cornice Cement – available as a fast-setting dry powder or a slower drying, pre-mixed formula • Tape measure and pencil • Bucket and water for mixing dry cornice cement • 38mm broadknife • Fine tooth saw • Cornice tool • Gyprock Mitremasta™ form Cove Cornice or a cornice mitre box for any cornice • Hammer and nails • Water and sponge for clean up MEASURING & CUTTING CORNICE 1. Measure the room for each length of cornice from corner to corner at the top of the wall and mark a guide line along the wall at a distance from the ceiling equal to the size of the cornice e.g. 75mm for Gyprock Aria. Ideally use a single length of cornice for each wall, however, sections can be joined with butt joints. 2. Corner joints need to be mitred using a Mitremasta or a cornice mitre box as a guide. Before cutting your mitre, mark on the cornice which is the ceiling edge and the wall edge. Always mark your length on the wall edge. Note: For internal corners, the ceiling edge will be shorter. For external corners it will be longer. 3. A Mitremasta can be used as a cutting guide for all widths of Gyprock Cove cornice. Always ensure the apex of the Mitremasta is on the ceiling edge and the guide lines up with the length mark on the wall edge of the cornice. Installing Gyprock® Cornice 4. When using a cornice mitre box, the ceiling edge is always placed along the bottom of the box. This will ensure your cutting length marks on the wall edge are aligned with the guides at the top for accurate sawing. Ensure the cornice sits square to the base and side, use a packer if necessary. 5. For internal corners, simply cut the appropriate angle that results in the ceiling edge being shorter. Change the direction of your cut for the other side of an internal angle mitre. 6. For external angle mitres, the wall length is the shorter length so cut the mitre accordingly. FIXING CORNICE Once your cornice lengths are cut, check that the lengths and corner cuts are correct before you start applying any adhesive. Take care to prepare the ends of any butt joints so they will accurately butt together. 1. If you’re using a dry Gyprock Cornice Cement, mix with water as per the instructions on the pack to give a smooth creamy consistency. The cornice cement working life is around 60 minutes, so only mix what you can use in that time. 2. Working on one piece at a time and starting with the shorter lengths, apply a 10mm thick bead of Gyprock Cornice Cement to the back of each edge using a broadknife. 3. Push the cornice into place firmly with the bottom edge along the wall guideline. Lightly tap in a few nails along the bottom and top edges of the cornice to hold it in place while the cement sets. 4. Using the broadknife and cornice tool, immediately clean off any excess cement. 5. Repeat this process with the rest of your cornice lengths, making sure you apply cornice cement to the mitres and any butt joints. 6. Clean off excess cement along the edges, corners and butt joints, filling any gaps with more cement as you go. 7. Once all the cornice is in place, clean down straight away with a damp sponge, being careful not to over saturate the paper face of the cornice or plasterboard. 8. Allow to set for at least two hours before removing the nails. Fill any visible nail holes with Gyprock Cornice Cement, clean and allow to dry before lightly sanding any excess compound at the junctions.SHOW LESS